What’s going on and thank you for reading this quick article. Today we’re gonna be showing you how to Turned Off Windows Defender permanently by Group Policy in Windows 10. In this way, you can use another Defender for your Windows.
Follow my step by step guide for turned off Windows Defender permanently by Group Policy using Windows 10.
1. Go To RUN And Write “gpedit.msc“
First of all, go to RUN by holding WINDOWS+R button as well as do in the below picture.

Go To RUN And Write “gpedit.msc”
2. Select “Administrative Template”
A popup window will appear, Choose “Administrative Template” as well as do in the below picture.
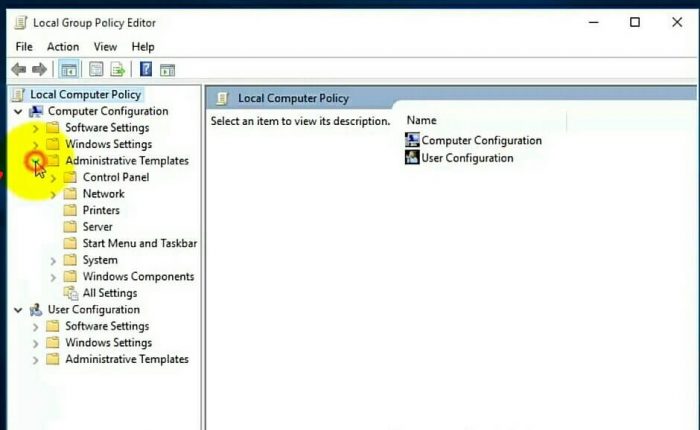
Select “Administrative Template”
3. select “windows component”
Again select “windows component” as well as do in the below picture.
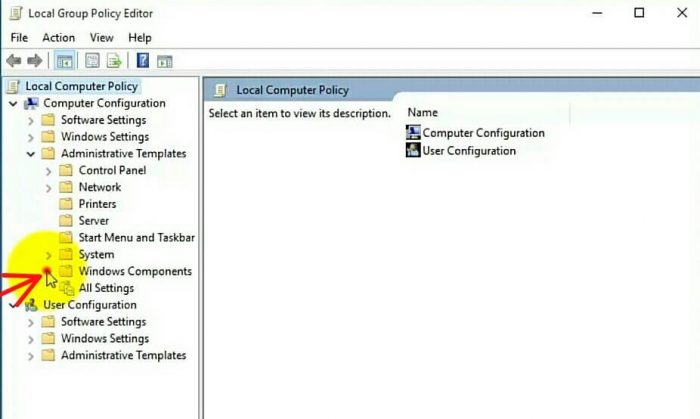
select “windows component” on the left side
4. Select “Windows Defender”
Select “Windows Defender” as well as see in the below image
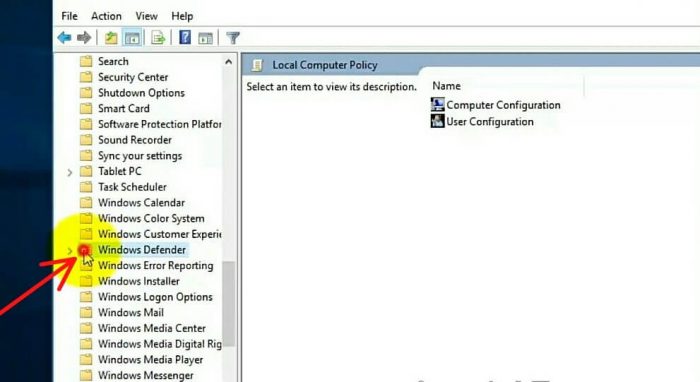
Select “Windows Defender” on the left side
5. Select “Turned Off Windows Defender” On The Right Side
You will see the “Turned Off Windows Defender” option On the right side, so enter in it, as well as follow in the below picture.
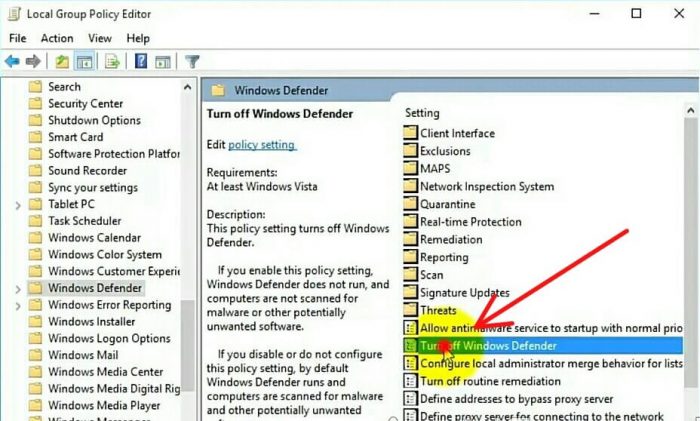
Select “Turned Off Windows Defender” On The Right Side
6. Select “enable”
You will see the 3 options, select “enable” option On the left side, as well as in the below image.
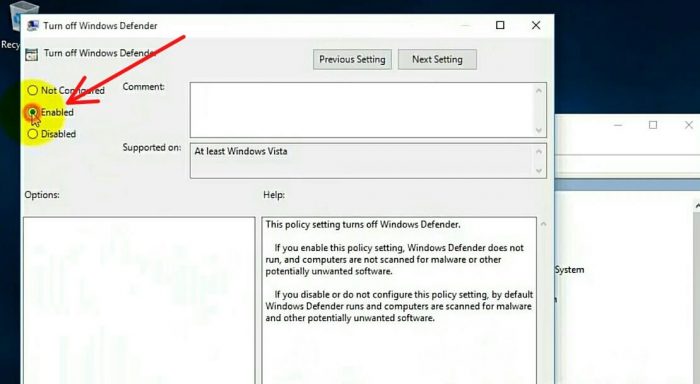
Select “enable”
7. Then “Apply”
After select enable option press Apply button, as well as follow in the below image.
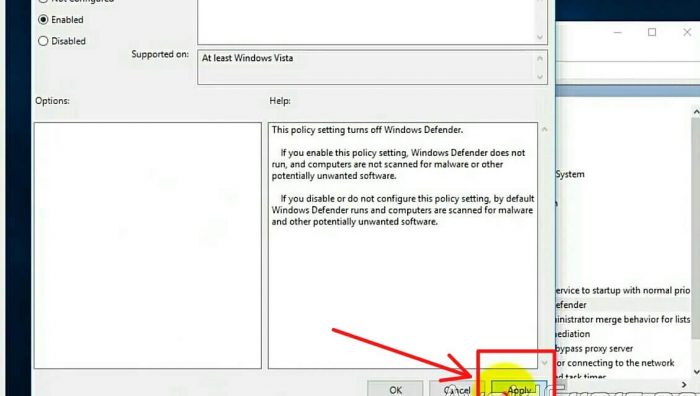
Then “Apply”
8. Confirm That Windows Defender Is turned Off?
So we confirm that Windows Defender is completely Turned Off by Group Policy, so type “windows defender” in the search bar, you will see the windows defender option on the top and enter in it, as well as follow in the below picture.

Confirm That Windows Defender Is turned Off?
9. Now Windows Defender Is Completely Turned Off By The Group policy
You will see a popup window will appear, which says that windows defender turned off by group policy using Windows 10.
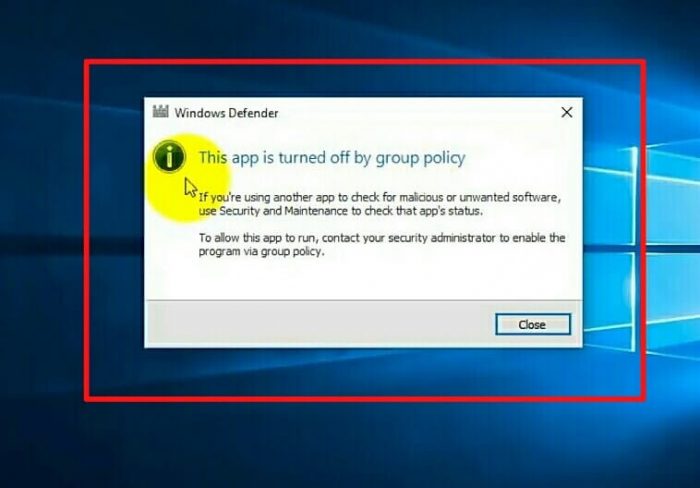
Windows Defender Is Completely Turned Off By The Group policy
By following this method we are completely windows defender turned off by group policy using Windows 10.
If you have any query about this article, give your comments below and show your love to share this article with your friends and helping others, because some people don’t know about how to turned off windows defender by group policy using Windows 10.


